| –ù–∞–∑–≤–∞–Ω–∏–µ | : | 12V Power Supply Repair |
| –ü—Ä–æ–¥–æ–ª–∂–∏—Ç–µ–ª—å–Ω–æ—Å—Ç—å | : | 17.27 |
| –î–∞—Ç–∞ –ø—É–±–ª–∏–∫–∞—Ü–∏–∏ | : | |
| –ü—Ä–æ—Å–º–æ—Ç—Ä–æ–≤ | : | 1,8¬Ýjt |


 |
It's got a little bit wet I think in burnt out because I can smell the burning on it You can smell it is something wrong I can smell it Comment from : @stevenhensman2541 |
 |
any chance you could take a shot at fixing one of those cheap variable power supplies from china? I need one and they keep going out on me Very fragile!! Comment from : @xIsaacCantu |
 |
Wouldn't it be much nicer for the environment if such devices were designed to be unscrewed instead of glued Perhaps we need revised UK legislation on accepting this type of construction, after all it should only put £ pence on the assembly cost There must me tens of thousands of psu's sent to landfill that maybe something as a simple wire fracture Comment from : @robjenkins9450 |
 |
Least boring PSR vid I have come across Subbed Lack of waffle/flannel hugely appreciated Comment from : @jamesward5721 |
 |
Please determine the electonic parts clearely Comment from : @user-pt6gk9cf7k |
 |
I love these things All "IDENTICALLY DIFFERENT" :) Something new each time It's amazing how so many devices have bypassed the saftey governing bodies, like UL etc Actually, quite un-nerving It's good we don't keep these in our houses - Oh Snap! Thank you for the teardown and ride along You RoCk (even 7 years ago:) ps Outstanding camera work! Cheers from SoCaUSA Comment from : @ovalwingnut |
 |
Nice catch, but I noticed when recording things do not always go right Like that one solder joint It may not be the prettiest, but it works Comment from : @jonesgang |
 |
Thanks Good job Comment from : @benjielocs8825 |
 |
Why you don´t search about the cause of the capacitor damage? I'm learning about this Nice technique and nice work done Comment from : @Charlliex |
 |
ÿ™ÿ¥⁄©ÿ±ÿ≤€åÿ±ŸÜŸà€åÿ≥ ŸÅÿßÿ±ÿ≥€å ŸÜÿØÿßÿ±ÿØ ÿüÿüÿüÿüÿüÿüÿü ÿߟÇÿØÿßŸÖ ⁄©ŸÜ€åÿØ ÿüÿüÿüÿüÿüüôèüôèüëåüëå Comment from : @mohammad45h |
 |
Good videos sorry to comment, lot of repeating and going over a point more than required, makes it boring rather than interesting Comment from : @parmindersagoo2891 |
 |
you didnt actually show how you found defective device , this video is almost worthless Comment from : @101markharris |
 |
Nice job Comment from : @bencoss7003 |
 |
One of the best closed up video of electronics I've seen However no inside ps ac or dc volts or amps measurements or scope waveforms, thanks anyway Comment from : @10760910eugenioyoutu |
 |
ngleskibrbrblah blah blah, a lot of talk about nothing, nothing is explained, very bad Comment from : @nedeljkooctenjak9690 |
 |
Are you the famos CS GO Player? JW? Comment from : @Nikolasz1173 |
 |
手工差 講多過做 興趣工 難以揾錢 老闆不能收留他。 Comment from : @tamsiuwing6546 |
 |
üëçüëçüëçüëçüëçüë¶ Comment from : @mmustapha794 |
 |
It's a bit hard to understand him How did he begin to suspect the capacitor? Comment from : @jpvoodoo5522 |
 |
Sorry to say this but you repeat yourself a lot Also, the process of opening the box is completely pointless It is great to have knowledgeable people like you helping less knowledgeable people like me understand that kind of problem but I would prefer if you would be a bit more 'prepared' and to the point if possible All in all its helpfull Comment from : @faisletoismeme |
 |
Thanks John Do you think the corrosion and deposits could have been caused by electrolyte expelled from the faulty capacitor That seems likely to me Comment from : @megawatt6430 |
 |
I enjoyed your video was useful
brIf possible, explain about that device (capacity tester) Comment from : @sasanlibertad134 |
 |
Your repair video is worthy of my subscription Well done Comment from : @chef1arjunaidi |
|
|
üëç Thank's Comment from : @mmustapha794 |
 |
Merci pour la vidéo Comment from : @keupondestroy911 |
 |
good Comment from : @practicallab |
 |
Time Travelling on YouTube!brbrSomebody spilled a little glue in the case, no worries! Comment from : @KermitFrazierdotcom |
 |
Scusa trovoil modo di aprire questi contenitori pericoloso per le mani e dannoso per l'integrit√Ý dell sctolino io ho messo a punto una mia tecnica, che consiste nel poggiare su una suoerfice fissa il dispositivo; poi usando un martello di plastica o bachelite, per non lasciare tracce, batto col martello lungo il bordo della saldatura; o linea di incollaggio; l0 stress fisivco costituito dal colpo di martrllo, mi consente di lesionae i lembi saldati o incollati del contenitore; suppongo agisca pi√π la vibrazione generata dal colpo di martello ben assestato, che fa scollare i lembi di chiusura del contenitore; non so di preciso cosa accade d√¨Ma alla fine il contenitore si apre senza spaccarsi o mostrare segni di forzatura, come nel tuo caspo i segni causati dalla punta del cacciavite! ci√≤ mi conente di incollarlo dopo con un collante gommoso tipo bostik senza che si notino segni del'intervento! Jon se mi consenti : non comprendo ilprerch√® hai pubblicato questo video? Certo non sei un mago dell'elettronica e dell'approccio tecnico/scientifico; se non testi i componenti con un o multimetro; non puoi risolverr il guasto! Comment from : @piodambrosio1427 |
 |
2:22 - lepiej wziąć zwykły nóż, ułożyć wzdłuż klejenia zasilacza, by ostrze pokrywało się z miejscem klejenia, i uderzyć w ten nóż np młotkiem - czasem trzeba kilka razy - wtedy ładnie się nam zasilacz otwiera :) Comment from : @PK-pt3qq |
 |
wow Comment from : @awesomeautomation105 |
 |
Nice videowhat camera are you using for this video please?brCheers Comment from : @gixerags750 |
 |
9:24 it’s open or low capacitor you placed the points improperly on the wrong solders it was placed not on the immediate opposite but to the upper solder to the inner side Comment from : @elekid330 |
 |
Good wark üëè Comment from : @eid-algasim |
 |
Thanks John! Great info Comment from : @BrettHoustonTube |
 |
Very well done! But, I would caution everybody to not use tin only solder Over time tin only solder produces "hairs" that can cause a short circuit damaging other components on the board If you look far enough, you can still find Tin/Lead 60/40 solder, just wash your hands well before handling food or smoking (for those who still do) I am restoring a Heathkit AR-3 receiver and will use modern components to do the job, but use the old solder to join the components I have about 15 pounds of the 60/40 rosin core solder in varying thicknesses so it should last me for a very long time A result of our "nanny State's" idea to "protect" us from ourselves Pointless, do you think? Comment from : @lomgshorts3 |
 |
Thanks I've always tought you cannot check capacitors in circuit Comment from : @ClbnaVGM |
 |
Would you please talk like an American? I don't understand a word Comment from : @membersataniccabalcoronau804 |
 |
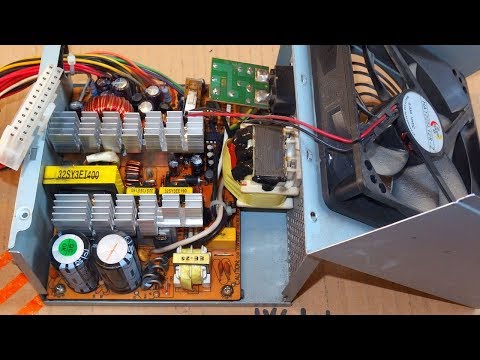
Octocupler full of rust Comment from : @0557630 |
 |
i think your nose blocked Comment from : @HeroHero-vg2sd |
 |
Keep it up, nice video, thank you for sharing it :) Comment from : @Bianchi77 |
 |
Would it be the faulty capacitor that leaked from the bottom and corroded other parts of the board? Comment from : @goku445 |
 |
Tankiu wary matching the work and helping Comment from : @pasargadzagroos9681 |
 |
Good picture When you zoom what you use camera ? Comment from : @thecmcmanthecmcman6043 |
 |
Job done JW - great stuff! Comment from : @colinmiles1052 |
 |
Good tiching karte hai üëåüëçüëåüëåüëå Comment from : @rahulpatelgujratahmedabad3497 |
 |
I do like your videos trying to learn how to solve problems with capacitors on washing machines,dryers well doneü§ó Comment from : @anthonygaunt8974 |
 |
This was so much fun to watch and discover these problems with you I've had devices that came back to life once the shorts had been resolved just from cleaning the PC board It also looked like R10 had been rusted at the bottom, but that's great you found it as a cap that was messed up Great video, 5 years old and one of the best brbrFew people have a camera set up to allow the viewer to inspect components visually with the tech Comment from : @paulfitzgerald4933 |
 |
Looks as if maybe the Mrs's spilled on it watering the plants or an animal has had a wee on it Comment from : @OldSkoolF |
 |
These power supplies are specified to last until any warrantee runs out brThey are made in sweat shops in China, Malaysia, or the PhilippinesbrUntil western economies take charge of their own production the garbage pile will grow exponentiallybrThank you JW for an instructive video of how to minimise that garbage pilebrCan repaired items like this be re-installed after repair? Comment from : @stevejagger8602 |
 |
Looks like a job for Mr Dremel 02:00 Comment from : @channelsixtysix066 |
 |
Hello how are you? I bought an original used power supply from the same model as my old power supply to be in reserve, but in tests with the multimeter I noticed that it is marking: 1890v, while the old and original notebook one marks: 1943v I wanted to know if this voltage difference between the sources could cause some damage in my notebook or if I can use it without problems? Thanks Comment from : @carlosGCT1981 |
 |
Take a screwdriver and with a little hammer few little strike each side and it's open and less dangerous than a cutter Comment from : @Angel1384 |
 |
Very fine video showing all what is required from carefully opening the small box to examining the internal circutry, finding the faulty component and performing the repair and finishing the repair jobAll done with very fine images and good explanatiations during the work Comment from : @perjensen2347 |
 |
Oh JW I dont know if you know but you are such a dry wit Love your videos, you make me laugh Comment from : @johnnoble9597 |
 |
Well done sir! You inspired me to do better next time I get a phone call like that, recognizing there's another person that needs help on the other end of that call Comment from : @waltschannel7465 |
 |
Great video, JW Comment from : @jimschiltz5343 |
 |
Priateľu len rozpráva, rozpráva a nakoniec hneď vie, ktorá súčiastka je zlá Comment from : @TEREZKATERKA100 |
 |
Tänan vend selgituse eest (Tallinn) Comment from : @leonhardnilsk870 |
 |
that looks like spillover from the adhesive holding the seam you opened all the way around it Comment from : @allenj7256 |
 |
My guess is that the sticky stuff is placed in there on purpose It’s probably there to heat up and create a humid/corrosive environment to shorten the lifecycle of the product Comment from : @leewoodrough242 |
 |
It is interesting to see the insides of psus, especially bricks Comment from : @ZeoAcinuz |
 |
I noticed any 12volt charger that sits for several years, eventually fail I purchased a used Mini refrigerator that uses a 12volt converter It no longer produces 12volts my guess was the capacitors inside dried up and failed This is very common with older equipment It's best to remove capacitors before testing Comment from : @scottfirman |
 |
Wonderfull when you do not even know component names and fix itüëçüëç Comment from : @shadowhunterxxx5891 |
 |
I would have replaced that optocoupler too That corrosion on the pins will eventually reach the internal led or the photoresistor Comment from : @guttenflax |
 |
Thanks for the video! I only have a regular multimeter, how can test the capacitor on the circuit without the gadget that you used in the video ? Comment from : @kingneo195 |
 |
Mine works and it turns on a computer fan but when on the same 12V contacts I add the cooling peltier plate the LED blinks and the fan doesn't turn on If I bypass the 12 Vdc with another power supply the fan spins and the peltier plate gets cold/hot I wonder if it is a load issue and what the component causing this could be Comment from : @paolomartini150 |
 |
I have a cool Boston Acoustics radio that has begun to hum during music, and also slightly when off too Would this be a component of the power supply? Old caps maybe? Comment from : @highcurrent1125 |
 |
ÊàëÊòØÁîµÂ≠êÁßëÂè∞ÂåóÂ∑•Â∞à‰∫åÂ∞àË£úÊÝ°ËÇÑÊ•≠‰øÆÁêÜspsÁîµÊ∫ê‰æõÊáâÂô®Êúâ9Âπ¥ÁªèÈ©óÁîµËÖ¶‰∏ªÊú∫Êùø‰øÆÁêÜÊúâ‰∫åÂπ¥ÁªèÈ©óÁúüÁ©∫ÁÆ°Èü≥ÈüøÁªÑË£ùÁª¥‰øÆÊúâ4Âπ¥ÁöÑÁªèȩ󉪕Ââç§ßÈÉΩÊòØÂú®ÈõªÂ≠êÂÖ¨Âè∏Áï∂Áª¥‰øÆÊäÄË°ìÂëòÂíåÁª¥‰øÆÂ∑•Á®ãÂ∏´ËºÉ§öËÉΩÈÄ≤Âè∞ÂåóÂ∑•Â∞à‰∏ÄÁöÑÁ•áÊúâ‰∫åÁßç‰∫∫‰∏ÄÊòØÂ≠∏ÁßëÈùûÂ∏∏º∑Ë°ìÁßë‰πüÈùûÂ∏∏º∑ËÄåÊàëÊòØÂ≠∏Áßë‰∏çº∑‰ΩÜË°ìÁßë‰∏ç˵ñÁöщ∫∫Êâĉª•Ëã±Êñá‰∏牺öÁ•áËÅΩÊáÇÊãîÂá∫ÁöÑÈõ∂‰ª∂Ë™™opÈñãË∑؉∏çÁ∞°ÂñÆËÉΩÂæûÁîµË∑؉∏äÊää£ûÁöÑÁîµÂÆπÊãîÂá∫‰ª£Ë°®‰ΩÝÊòØËÄÅÂ∏´Áà∂Á∫ß˨ù˨ù‰ΩÝÁöÑËßÜÈ¢ëÊïéÂ≠∏ Comment from : @user-vq7zn7wk5k |
 |
Hi John, you put on a better understanding correcting the subject matter thank you Comment from : @mauinka123 |
 |
3:56 bridge rectifier Comment from : @zainshahee |
 |
hi, thank you for making these great videos1 im wondering if you could teach me how to wire a dc motor , bi-directional switch, usb charging module tp-4056, a 18650 rechargeable cell pls/ Comment from : @scottlei |
 |
Hi John Just my thought on the sticky deposit there, given that the case was probably "plastic welded" using an induction coil to melt the plastic together, this would have meant that no glue was used to stick the two halves together this is quite a common method for sealing psu's together these days Could the sticky deposit be melted varnish which had dripped from the inductor which may have become very hot during operation, which subsequently settled onto the plastic case? Once cooled it would have left a deposit similar to what you found? Just a thought ;) Comment from : @boredwithusernames |
 |
i found the video quite thorough ( topnotch zoom & focus), thanks I have one of these fairly common PS - could one bypass/remove the rectifying circuitry to get 12VAC? i need 11VAC input for a Hitachi turntable, so i was thinking of removing some windings of the secondary coil IF they are accessible - would you reckon it is a viable option or what would/could you suggest please sir (11VAC seems to be quite scarce, like chicken teeth) 12VAC spins the (dc servo) motor, but obviously the speed is all messed upand how tunable is such low AC power with low voltage components if possible at all (for diy people) Comment from : @andrevdm6406 |
 |
Some people are liar liar repair I want to talk with the boys before Christmas Comment from : @fathemasultana1027 |
 |
its just glue unlovely put on there by an eastern worker that didnt get well paid i guess Comment from : @danielcr0w |
 |
Everything is cool but that clicking sound from your mouth is really annoying No hard feeling next time don't do It please :D Comment from : @alixxworkshop846 |
 |
Good video Thank you I find it much quicker to just replace the suspect capacitor with a better quality one No need to check it Comment from : @anonamus4860 |
 |
please use a wire cutter or pliers on the offending kaput component and put it out of its useless existence ie give it the chop Comment from : @johncliff4498 |
|
|
Would love to see some more repair videos! Comment from : @OldSkoolF |
 |
Very bad solderingvery bad! Comment from : @Atelierul29 |
 |
Youtube an american company has created many foreign multi millionairesgotta love usa Comment from : @shelby50411 |
 |
I would have liked to see you measure the capacitance and ESR of the old and new capacitors Just to show us the difference Comment from : @firstman9273 |
 |
That is what I call low quality teaching There is virtually nothing informative in this video Comment from : @mariuszkalwer5278 |
 |
Im collecting AC adapters now Comment from : @antresia9723 |
 |
Those are normally sonically welded (as you discovered) If you bthink/b that there's a screw lurking under a label, it's better to just give it a couple of pokes with an x-acto, awl or similar to "break thru" the label This way, if there aren't any screws you haven't destroyed the label for no good reason I prefer an x-acto for this job because if you do discover a screw hole, it's easy to make a clean round slice around the screw hole for screwdriver access Comment from : @vandal968 |
 |
Next time find a straight very sharp knife edge and put the PS sideways andbrwith a small hammer Wack the knife edge and it will slowly open inch by inchbrand that is a lot safer !brI learned this here and ever since all my small wallwart PS can be re glued perfectly !!brEnjoy !! Comment from : @dnantis |
 |
Hi John, can you teach me more of electronics? Comment from : @chrisnguyenDQ2012 |
 |
Ah, all the DC adapters I have thrown away in my life they all could have been fixed by simply replacing one component? Comment from : @typingcat |
 |
it could be remains from the glue that was used from the factory to close the two sides of the box Comment from : @Kerveros1904 |
 |
Nice video but please talk clear English pronounsing each letter for us foreigners whom English is not their mother langauge Comment from : @yoramstein |
 |
What is the resistor value Comment from : @adeyemoolusegun4828 |
 |
HOW TO REPAIR ATX POWER SUPPLY NO POWER/Computer Power Supply repair. –Ý—ï–°‚Äö : AA Electrotech Download Full Episodes | The Most Watched videos of all time |
 |
How to repair dc power supply /15v 2A dc power supply repair/voltage not regulate problem/ –Ý—ï–°‚Äö : Batta Products Download Full Episodes | The Most Watched videos of all time |
 |
Turning an HP DPS800GB power supply into an RC Bench Power Supply. Your cheapest power supply option –Ý—ï–°‚Äö : DroneRacer101 Download Full Episodes | The Most Watched videos of all time |
 |
How To Repair a Computer Power Supply (or other switching power supply) –Ý—ï–°‚Äö : DiodeGoneWild Download Full Episodes | The Most Watched videos of all time |
 |
DC power supply voltege u0026 current not working | DC power supply step by step repair –Ý—ï–°‚Äö : Dinesh Repairing Centre Download Full Episodes | The Most Watched videos of all time |
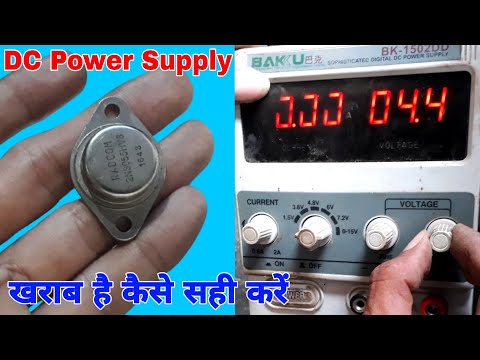 |
baku 1502dd digital dc power supply repair/ DC Power Supply ý§ïý•àý§∏ý•á ý§∞ý§øý§™ý•áý§Øý§∞ ý§ïý§∞ý•áý§Ç –Ý—ï–°‚Äö : AMR ANSARI Download Full Episodes | The Most Watched videos of all time |
 |
Dc power supply voltage up down problem Sulotion repair power supply for mobile #farooq technology/ –Ý—ï–°‚Äö : FAROOQ Technology Download Full Episodes | The Most Watched videos of all time |
 |
Power Supply Repair 12v -15A ÿßÿµŸÑÿßÿ≠ ÿ®ÿߟàÿ± ÿ≥ÿ®ŸÑÿßŸä –Ý—ï–°‚Äö : Ahmed Halawa Download Full Episodes | The Most Watched videos of all time |
 |
How to convert a DELL Server power supply to 12V bench supply for RC.wmv –Ý—ï–°‚Äö : JoeyG FPV Download Full Episodes | The Most Watched videos of all time |
 |
How To Repair ATX PSU. The Full Tutorial. Computer Power Supply Repair –Ý—ï–°‚Äö : Learn Electronics Repair Download Full Episodes | The Most Watched videos of all time |