| –ù–∞–∑–≤–∞–Ω–∏–µ | : | Honda CR-V Serpentine Belt Installation 2007 - 2011 in a half hour with no special tools |
| –ü—Ä–æ–¥–æ–ª–∂–∏—Ç–µ–ª—å–Ω–æ—Å—Ç—å | : | 12.04 |
| –î–∞—Ç–∞ –ø—É–±–ª–∏–∫–∞—Ü–∏–∏ | : | |
| –ü—Ä–æ—Å–º–æ—Ç—Ä–æ–≤ | : | 399¬Ýrb |


 |
Thank you, your video helped me change my belt for the first time Comment from : Jeff Witulski |
 |
My man, i spent like 30 minutes trying to use a 14 mm and another bigger wrench for leverage I soon i saw your video, and i said Hallelujah!!!brI was able to put back the belt over the pulley under one minute Im so grateful for your video Thanks again, amigo!!!! Comment from : JCNLALA |
 |
Thank you great explanation!!! üëç üëè üëè üëè As a women learning cars and saving money I come to you tube and learn and one thing I like is someone who knows their stuff Your explanation is spot on it really easy to watch ur videos Big Thank you Catey Comment from : Catey Parr |
 |
Wrong belt moron Comment from : Dan Havard |
 |
just thank you Comment from : Aloisio Morais |
 |
Excellent tutorial, thanks (from France) Comment from : Patrick Deslandes |
 |
perfect video Thanks Comment from : Justin Palentchar |
 |
Excellent! Thank you! Comment from : JohnBaker3000 |
 |
The combo wrench and ratchet is a great idea To remove the CRV drive belt you need a bent bar [like the Honda Tool] otherwise with a traditional long straight bar you run out of real estate quick and can't release enough tension Comment from : Trevor Syversen |
 |
Cut the old one off so you only have to wrangle the tensioner once Just saying Comment from : joe marri |
 |
Thank you!! This helps a TON! Comment from : Stacey Vargas |
 |
Brilliant, thats very impressive, top notch Thanks Comment from : Martin Gibb |
 |
Bruh I can’t get on, I done spent two hours, brEdit I got it on after pulling it over the tensioner last it squeaks a bit but it’s on atm Comment from : Anime Princess |
 |
2011 CRV needs a 1745mm belt Huge pain to do the install for me Took about 2 hrs total When installing the belt, you still pull forward (to the front of the car) For whatever reason I had in my mind you needed to push the tensioner backwards towards the rear of the car Not really intuitive to me, so the tensioner bolt loosened I puzzled over that for a minute until I realized my mistake brbr$46 for the belt Got a Dayco 1745mm 7 rib Borrowed their serpentine belt wrench as well from Advance Auto, but not enough space to use it Box wrench and breaker bar, like in the video was best Pull the plastic shroud off that sits at the front of the engine compartment to get another inch of clearance You'll need it Super tight fit And use a helper Couldn't do it myself Comment from : Nathan Hopper |
 |
You should know Harbor freight has auto tools like this so that way you could easily replace your belt Comment from : Ricardo Santiago |
 |
Very clear video Great camera work despite only having 2 hands Comment from : David Z |
 |
Love how the numbers on the diagram are 666 have fun Comment from : Judge Roy Bean |
 |
Thanks! Great video! Comment from : Jose Cochula |
 |
Thanks for the video Did this today Pain in the butt, but your tips were very helpful Thank you so much Comment from : Mike A |
 |
you know it's going to be a pain in the ass when the page is listed as 6-66 Comment from : Dirk Tucker |
 |
Thank you! Your good advice is still doing good! Comment from : T Sizzle |
 |
Awesome Excellent job Thank you for sharing so many time and sanity saving tips and tricks Engineers ain’t got sh!t on you!! Comment from : MrPerry |
 |
Thank you so much Budget Mechanic I did exactly what you said it work like a Charm and it was my first time and I’m not a a mechanic just a average Joe you saved my day Comment from : Carlos Aguirre |
 |
Tie strap? Wtf planet are you from? Comment from : Restless Reddit |
 |
youre a genius with the 1/2 inch ratchet coupled to the 14mm open end wrench ive not ever seen that im 18 years in the business Comment from : Political Patterns |
 |
Great video, I wish all were as good Comment from : Bob May |
 |
That diagram is from the devil üòà Comment from : MillzLambz |
 |
Cada cuantos millas hay que cambiar? Comment from : SB |
 |
Excellent video!!üëç Comment from : Z Murray |
 |
Your not 2011 86 that krap Comment from : ALWOOTEN 1386 Wooten |
 |
Awesome video Even women and children could do this job now!! Comment from : P Wilki |
 |
Thank you very much! I think you channeled Bob Ross for this one Comment from : Faith Mattheson |
 |
Thank you! Comment from : Charles Taylor |
 |
8:28 whole reason I looked up a video at all was to see how you put that thing on therebrbrNice wipebrbrDarnit Comment from : emolatur |
 |
Great video but if I can make a suggestion I removed power steering reservoir and the bracket (2 10mm) the other huge suggestion is go over the top power steering pulley if by yourself The alternator pulley was damn near impossible Top power steering was a breeze Comment from : RamAuDie |
 |
Awesome video! The trick using the breaker bar with the 14mm wrench works like a champ One thing to note: get the belt started on everything except the water pump (smooth) pulley That's the easiest to slide the belt over Also, if the belt doesn't seem to want to fit, tap the starter a little bit (making sure fingers are away!) which will take the slack out, allowing the belt to easily slip on the water pump pulley Comment from : Donald Lane |
 |
Great video Love the tip about attaching the new belt to the old, why didn't I think of that?! Comment from : MacCready |
 |
Perfect! Thanks for your video Really helped me out Comment from : heavypiano |
 |
Thank you man…Super Comment from : Meshal |
 |
14mm wrench and a 1/2" ratchet -- that my friend is pure genius! Thank you for taking the time to post this, probably saved me from an aneurysm! :) Comment from : Bill Kibby |
 |
Hello, very good video I really liked the rachet in the 14 mm wrench trick Thank you very much Comment from : Michael Lowry |
 |
great content GOD BLESS YOU üôèüèæ thx Comment from : YAHUAH Servant 7 |
 |
Should you mark the top of each pully with a red dry erase market to exactly 12 to prevent any from being off mark while working Comment from : Scott Anderson |
 |
Brilliant thanks üëç Comment from : Patrick Breakspear |
 |
Very Nice Brother, mine just got torn to shreds, will pick one up at the local AutoZone, and a 14 mm wrench to go along!! Should be able to GiTrDone!!! Ps Epstein didn't kill himself!!!! Comment from : Miguel Tiempos |
 |
Thanks so much, smart install Comment from : Marilyn Johansson |
 |
Thks a lot for the video!brto fit the new belt, I turn the pulley of the hydraulic pump Comment from : Matias Burton |
 |
Yeah I resorted to the spanner and ratchet in the end but still could not get enough clearance to get the new belt around the alternator Dont know if soaking the new belt in hot water might help but Ive re fitted the old one for now Comment from : BTN LED |
 |
Very good demostration and explanations Tks Comment from : Anthony Nicholls |
 |
Dude, the ratchet on the box wrench was clutch! Thanks for the vid Comment from : Matthew Rowell |
 |
Thank you for such an easy to follow tutorial The only hiccup I had was that the tensioner bolt was actually a 15mm It was replaced previously so perhaps the aftermarket part varied from the OEM Anyway, excellent video! Comment from : crock112 |
 |
Man, thank you SO much for this video I just swapped out the belt on my 2011 CR-V following what you said, and it was a cinch The tips you mentioned: zip tie the new belt to the old belt, and route the new belt over the alternator last while pulling on the belt tensioner that saved SO much time and headache, and got the job done much easier If the belts werent tied together, it would have made the job MUCH more difficult And as "YardpigTSI" mentioned: using the combo wrench with a ratchet on the tensioner nut in that tight location genius Really excellent video!! Thanks again!! Comment from : Ray |
 |
6-66 Comment from : Tucan |
 |
I absolutely cannot get the new belt on, keeps slipping off the tensioner as I try to push the belt onto the alternator I just had my tensioner replaced and it doesn't have any 'guides' on it, wondering if it should? Comment from : Jaimelapoesie |
 |
Not much of a mechanic myself with today's cars, so asked my "instant oil change" place to do this on my CRV (as they advertised) Had two guys on the job and they threw up their hands up at it after only about 15-20mins I'm done going to that place! Excellent video btw! Comment from : DfromSD |
 |
Great videoüèÜ Comment from : MURMAID HUNTER |
 |
Your video definetely saved me today! Thank you so much! Very well explained and showned! Comment from : D Tel |
 |
Thank you for making this video Comment from : Michael Carnahan |
 |
Very nice video Thanks Comment from : kd1366 |
 |
Thanks for sharing Comment from : Wilhelm Maravilla |
 |
Man you explain soooo nice and easy that iveen i get the ideea how to do iti love you man :) thx a loooooot Comment from : savoi elvis |
 |
Thank you for this very informative and very detailed instructional video This will help me a great deal Thanks Comment from : Jeff Beck |
 |
THANK YOU SO MUCH FOR THIS!!!!! UR A LIFE SAVER!!! Comment from : paul olivas |
 |
like subed I loved the extion trick Comment from : Fix your boat and more |
 |
Excellent tutorial Worked out perfectly Thanks so much! Comment from : Bud M |
 |
Easy to understand step by step instructions with no shortcuts! You Sir have my respect, thank you Comment from : Joseph Nduati |
 |
I am NOT an experienced replacer of automobile serpentine belts but my mechanical skills have kept a few Navy jets up in the air See this comment as a question, not a criticism, please The Goodyear belt that Robert spec'd is now a Continental belt as Continental purchased that business division from Goodyear The part number is still the same, PK070690 The last four digits, "690" indicate the length of the belt, 69 inches or 17526 mm The OEM Bando belt is 7PK1745, the last four digits in the part number indicating the belt's length in mm, 1745mm In fact, the Bando cross reference for the Goodyear/Continental PK070690 belt is 7PK1755, a full centimeter longer than it's OEM replacement offering Like I said, I am NOT an expert in these matters and I would appreciate someone who is commenting on whether a serpentine belt that is 76mm or 10mm longer than the factory spec could be problematic I am especially interested in any long term implications if these belts stretch over their useful life Thanks Comment from : Guy Cheney |
 |
I found it easier to come up through the bottom There was more room But great video tho Comment from : Old School Repair Shop |
 |
The open-end wrench & ratchet approach is perfect for the CR-V I replaced the alternator today and while attempting to remove the belt started off trying to use a serpentine belt tool but wasn’t making any headway due to the location of the CR-V’s tensioner I pulled up your video in the garage and had the belt off in no time Thank you! Comment from : J G |
 |
This video helped a lot, but in our case the belt had already failed (leaky PS pump had soaked it and slippage shredded it) Because it was just a maze of pulleys that belt diagram was priceless!brComing from the electric industry, the safety issues with the wrench/socket driver led me to get an actual tensioner tool - cheap enough, but limited throw Mickey-mouse extracts its price in blood eventually and the tensioned belt will be happy to remove fingertips It was imuch/i easier after removing the reservoir and the bracket that held it (the one with the slicing edges seen around 9:00) but still no fun In our 2008 the reservoir clipped to a sub-bracket that bolted on like your reservoir didbrThe Gatorback belt looked much more pliable than our NAPA belt, which insisted on being held onto every pulley as The Time got closer The water pump pulley is a good choice for last one if you have a helper under the car, otherwise the PS pump pulley is good Again, pliability was an important factor in the choices Comment from : flagmichael |
 |
I just want to give a heads up before you take that ps reservoir bolts up you may twist the bracket if that happens its best to to do it from the bottom after jacking the crv Comment from : Jesus Ramirez |
 |
Great well explained video Comment from : Robert Chalice |
 |
Thanks for the video did it myself wasn't an easy task but did it after a while LOL !! Comment from : G Mango |
 |
Buddy, it's a damn shame you made this video and did not follow with 5,000 more car repair videos brYou could have been big Comment from : mart9898 |
|
|
Love the ratchet in the box wrench and the zip tie the belts tips! Hot! Comment from : Matthew Rowell |
 |
I actually had better luck having a second person push the belt on from underneath, but still incredibly helpful, thank you Comment from : K Orovic |
 |
Excelente método y recurso de herramientas!! Potenciado si sumamos el método sugerido por Anthony Lee
br, terminando de colocar la correa, con ayuda de alguien (amigo, esposa, vecino, etc) que mantenga el tensor desde arriba del vehículo apretado, deslizando con nuetar mano suavemente la correa sobre la polea del cigueñal, sin lastimar la correa! :) Comment from : Jorge Marza |
 |
There’s a reason the paper says 666 because those engineers who designed it were possessed by satan himself This video helped a lot I got it done in under an hour but I’ve never yelled so many Obscenities at an inanimate object before in my life that trick with the wrench and the 1/2 drive is a life saver without that I would’ve probably throw a wrench through the front windshield and set the car on fire for an insurance claim Comment from : sal ingram |
 |
Great video! Thanks a lot! Comment from : hat bui |
 |
Wow, so easy! I was a bit hesitant to take on this task because of how little room there is to work, but it really was 30 minutes, no special tools, and no special skills! I did detach the power steering reservoir and disconnect one hose to give me a bit more room After that it was straightforward like in the video I had my helper take out the slack from the top, and I slipped the belt on the crankbrbrbrThank you for the video and all the tips! Comment from : Steve W |
 |
Excellent! Comment from : Ray Sallee |
 |
Thankyou Comment from : Brittany Schaefer |
 |
Thanks for sharing, I had the same car - this video will help me in future Comment from : JT K |
 |
Thanks so much for this! I’m sure you just saved me hundreds Comment from : Rob F- |
 |
Excellent video You explained as a professional I like when people like you take detail time to help people Thank Mr Robert Most Comment from : David Mares |
 |
6 hrs and nothing Comment from : Ney Garcia |
 |
Thank you for posting this Robert, it was most kind and generous of you Your tensioner tip is excellent as my tensioner tool was completely useless Awesome video Comment from : Greg Newlin |
 |
The trick with the 14m and socket driver was sweet The zip tie was slick as well Great video Comment from : Greenpea |
 |
Love the trick with the 1/2" ratchet on the combination wrench!¬ÝVery tight working quarters and that¬Ýworked great thank you! Comment from : YardpigTSI |
 |
The best auto repair video Comment from : p Lee |
 |
Nice presentation I did a friend's CR-V last year and if I remember correctly it was the water pump pulley that slid the last part of the belt in Also, in case this might be helpful, the following belts should also fit this CR-V:brbrbrBando 7PK1755brACDelco 7K690brGates K070690brbrbrCheers! Comment from : Ubong Akpan |
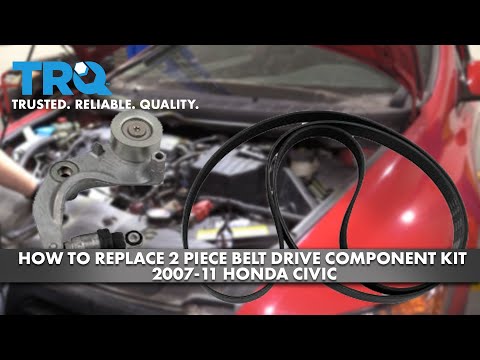 |
How to Replace Serpentine Belt u0026 Tensioner 2007-2011 Honda Civic –Ý—ï–°‚Äö : TRQ Download Full Episodes | The Most Watched videos of all time |
 |
8th Generation Honda Civic Drive Belt/Serpentine Belt Replacement Tips –Ý—ï–°‚Äö : Big Dog50001 Automotive Download Full Episodes | The Most Watched videos of all time |
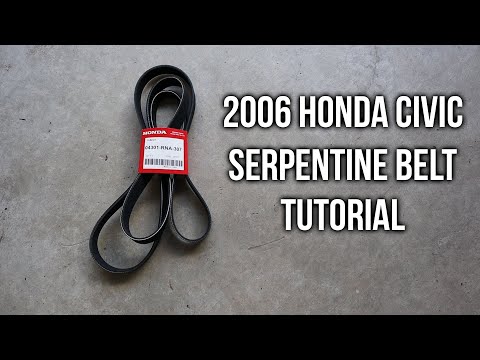 |
2006 Honda Civic Serpentine Belt Replacement Tutorial + TSB/Recall, Belt Length Info –Ý—ï–°‚Äö : nukem384 Download Full Episodes | The Most Watched videos of all time |
 |
2007 Honda Civic (8th gen) - Serpentine belt tensioner replacement –Ý—ï–°‚Äö : David S. Download Full Episodes | The Most Watched videos of all time |
 |
How to Replace Belt Tensioner u0026 Belt HONDA CIVIC 1.8L 2007~2012 R18A1 A5 –Ý—ï–°‚Äö : mesing2005 Download Full Episodes | The Most Watched videos of all time |
 |
2008 Honda Civic Serpentine Belt Installation –Ý—ï–°‚Äö : Jimmy Yin Download Full Episodes | The Most Watched videos of all time |
 |
Honda Civic Serpentine Belt Installation and Tensioning –Ý—ï–°‚Äö : Vincent Stevenson Download Full Episodes | The Most Watched videos of all time |
 |
8th Generation 2008 HONDA CIVIC Multi V Belt Replacement | 2006 - 2011 AUTOMATIC belt number –Ý—ï–°‚Äö : RSK ENTERTAINMENT VLOGS Download Full Episodes | The Most Watched videos of all time |
 |
Belt Tensioner u0026 Belt ‚Äì 2006-2011 1.8L Honda Civic –Ý—ï–°‚Äö : BlueDriver Download Full Episodes | The Most Watched videos of all time |
 |
Honda Civic: Serpentine Belt Replacement - 9th Gen 2012, 2013, 2014, 2015 –Ý—ï–°‚Äö : Save Money TV Download Full Episodes | The Most Watched videos of all time |